I'll admit to you, I have a "mild" obsession to ROSE GOLD. Before I even notice, rose gold has invaded my possession. From accessories to makeup brushes to phone cases o actual handbags, I'm happy to find a bit of rose gold everywhere.
Back when I was in Tokyo this past April, I walked into my favourite store category : Homeware / Decorative / Furnishing... You know, places filled with little witty fun stuff to sass-up your home. (Yep, that's a category for me.) I walked into FLYING TIGER COPENHAGEN, a household goods store (thanks to Google).They also have stores located in the UK and the US. The store is filled with quirky, cute and cheap homeware. And surprise surprise, I got some rose gold stuff in there for real good deal.
It's a house-shaped storage basket and a picture frame (all in rose gold) !! Plus my rose gold accessories and a cute picture of a floral porcupine from IKEA. Correct, Smarties~ I am using this storage basket thing to organise my jewelry. Here's HOW:
I stood it upwards and hang all my earrings on them. Yeah you can judge me, I have a lot. :|
I was more than happy to see the way I put them up, it's clear and easy to see, it's very convenient to just grab and go. I couldn't be happier with this. (Or could I??)
Then I realise this major issue : WHAT ABOUT MY EAR PINS? I have a ton of those. And now I don't have a good home for it. They didn't want to stay in a box where they're randomly scattered and super hard to find the right pair.
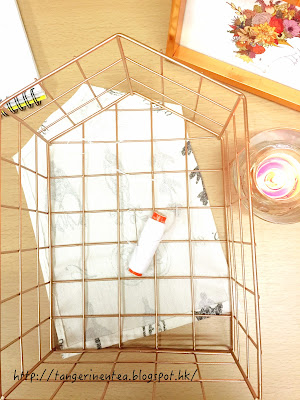
Then it goes without saying, I am up for this challenge. I noticed how the backside of the basket is completely empty an free. I decided to cover the back with some kind of fabric so I can pin my ear pins on! Genius, no? I spent about four hours yesterday doing trial and error, going back and forth, Here's what I used -
I used the fabric I bought the other day from again IKEA. It's printed with different flowers and plants which if I love anything more than rose gold, it's floral. I also have my half burned violet tea light with me the whole blimey 4 hours. ><
I started with tracing around the basket on a recycled A4 paper. Then I saved about a half-inch distance from the traces so I can fold the fabric in. I then cut the trace paper out to help cutting the fabric. Next, I fold in the sides of the fabric and sew them together in order to make it sturdier. If you have fabric glue you can use that, I just kinda don't. Then I have something like this -
Final step is just to cover it onto the back of the rose gold storage basket and VOILA.
Just kidding, of course the final step is to hang up the Jewelry and I am DONE!!!
Well upon viewing this I noticed I should have the right side up for the fabric so the plants don't look upside-down but... well I'll go with it. Also if you try this you may want to put the front side in instead of what I did so you can see the beautiful fabric facing in.
Nonetheless I am very happy with how this DIY project turned out.
Oh and I used these tiny floral bowls to store my rings and they sit nicely at the bottom of my basket.
Lastly I feel like I should give credit to my cute blog planner notebook thing.
Thanks to this, my blog post are much more on-time and I type much faster knowing what to say. I draw the "Let's blog some shit" on and the notebook is all blank pages from IKEA.
Thanks for reading, try it out if you want to and tell me how it goes. ^^
Have Fun.
Tangie.


No comments:
Post a Comment